Page: 1
/ 14
Total 83 questions
Linux Foundation Certified Kubernetes Administrator CKA Exam Questions
Question 1
SIMULATION
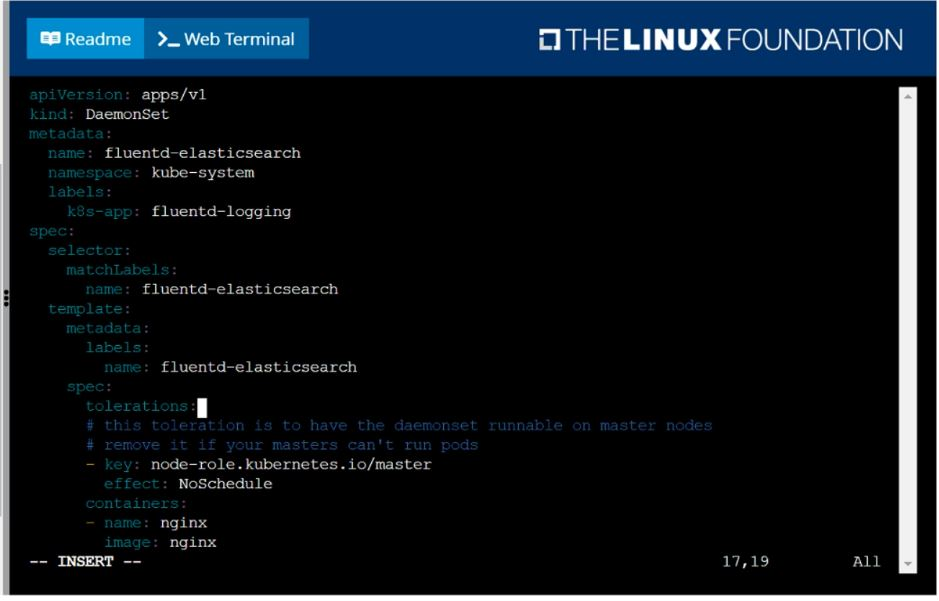
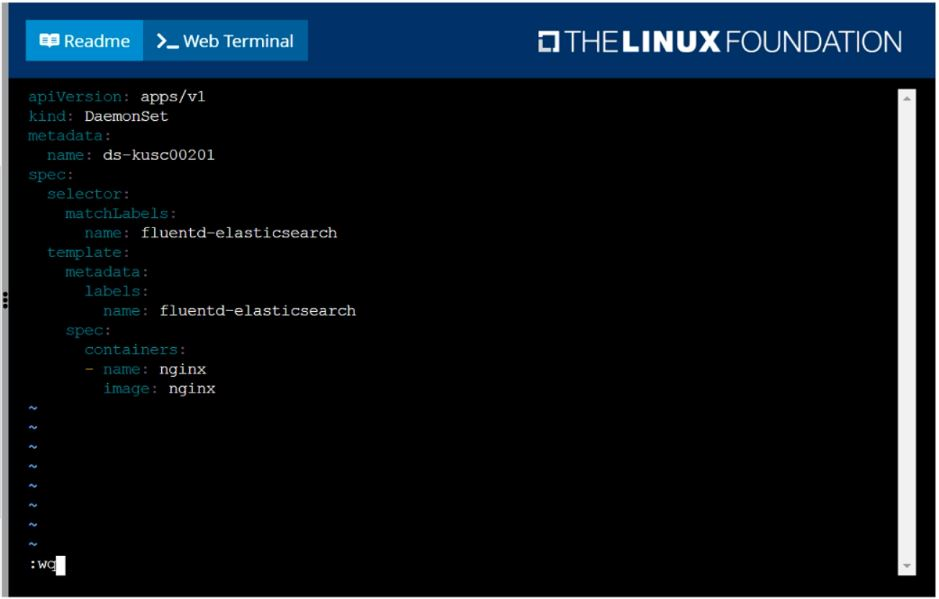
Ensure a single instance of pod nginx is running on each node of the Kubernetes cluster where nginx also represents the Image name which has to be used. Do not override any taints currently in place.
Use DaemonSet to complete this task and use ds-kusc00201 as DaemonSet name.
Answer : A
solution

Question 2
SIMULATION
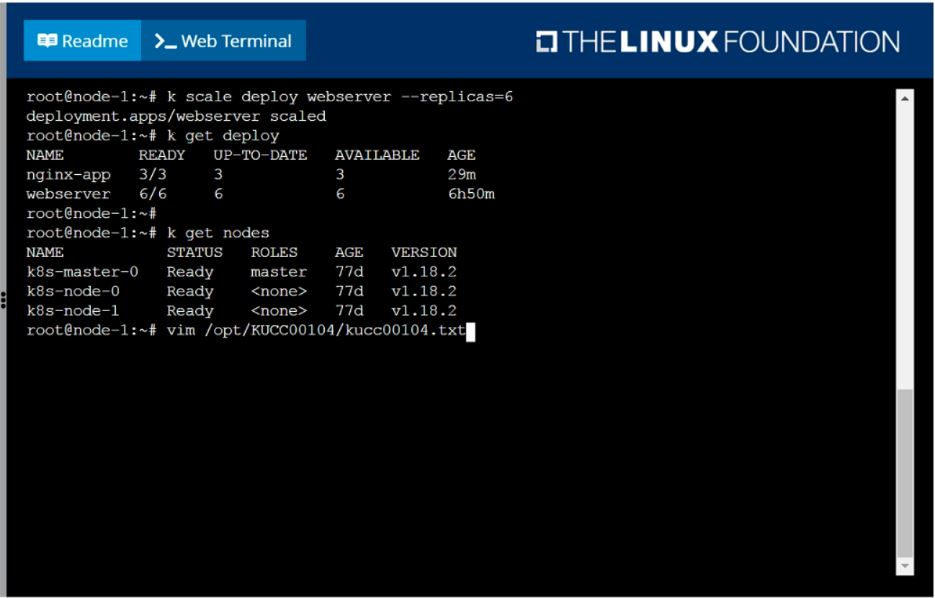
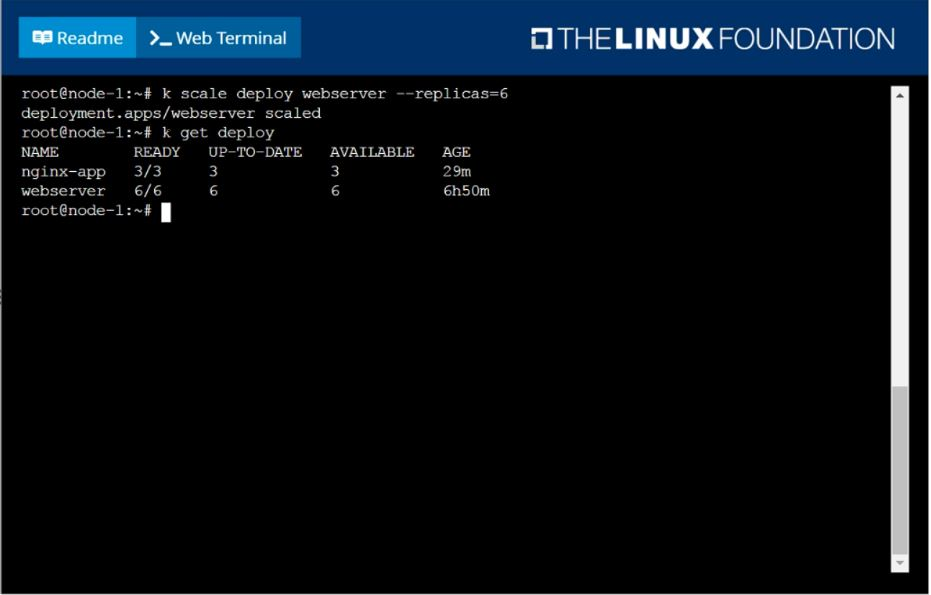
Scale the deployment webserver to 6 pods.
Answer : A
solution
Question 3
SIMULATION
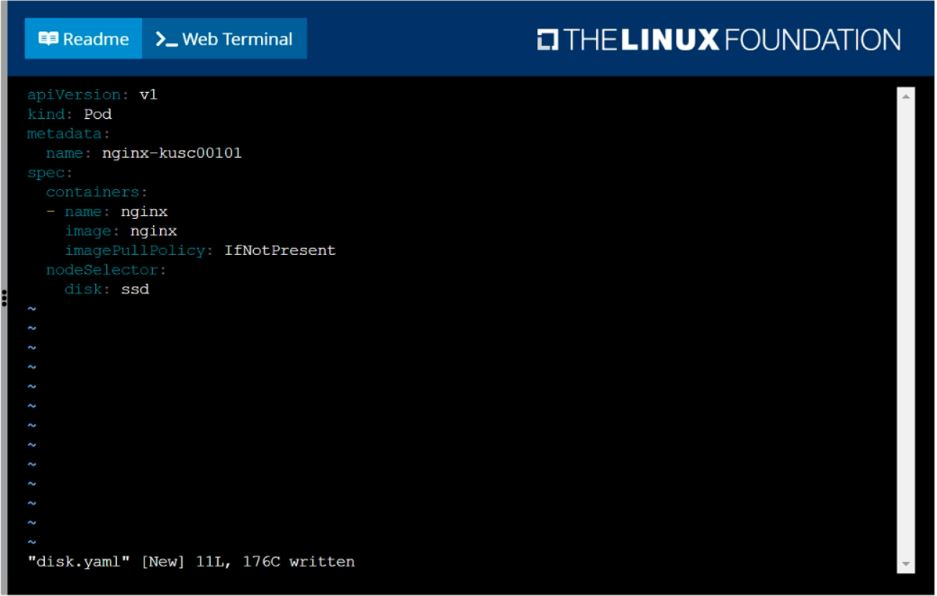
Schedule a pod as follows:
Name: nginx-kusc00101
Image: nginx
Node selector: disk=ssd
Answer : A
solution

Question 4
SIMULATION
Create a pod that having 3 containers in it? (Multi-Container)
Answer : A
image=nginx, image=redis, image=consul
Name nginx container as ''nginx-container''
Name redis container as ''redis-container''
Name consul container as ''consul-container''
Create a pod manifest file for a container and append container
section for rest of the images
kubectl run multi-container --generator=run-pod/v1 --image=nginx --
dry-run -o yaml > multi-container.yaml
# then
vim multi-container.yaml
apiVersion: v1
kind: Pod
metadata:
labels:
run: multi-container
name: multi-container
spec:
containers:
- image: nginx
name: nginx-container
- image: redis
name: redis-container
- image: consul
name: consul-container
restartPolicy: Always
Question 5
SIMULATION
You must connect to the correct host.
Failure to do so may result in a zero score.
[candidate@base] $ ssh Cka000060
Task
Install Argo CD in the cluster by performing the following tasks:
Add the official Argo CD Helm repository with the name argo
The Argo CD CRDs have already been pre-installed in the cluster
Generate a template of the Argo CD Helm chart version 7.7.3 for the argocd namespace and save it to ~/argo-helm.yaml . Configure the chart to not install CRDs.
Answer : A
Task Summary
SSH into cka000060
Add the Argo CD Helm repo named argo
Generate a manifest (~/argo-helm.yaml) for Argo CD version 7.7.3
Target namespace: argocd
Do not install CRDs
Just generate, don't install
Step-by-Step Solution
1 SSH into the correct host
ssh cka000060
Required --- skipping this = zero score
2 Add the Argo CD Helm repository
helm repo add argo https://argoproj.github.io/argo-helm
helm repo update
This adds the official Argo Helm chart source.
3 Generate Argo CD Helm chart template (version 7.7.3)
Use the helm template command to generate a manifest and write it to ~/argo-helm.yaml.
helm template argocd argo/argo-cd \
--version 7.7.3 \
--namespace argocd \
--set crds.install=false \
> ~/argo-helm.yaml
argocd Release name (can be anything; here it's same as the namespace)
--set crds.install=false Disables CRD installation
> ~/argo-helm.yaml Save to required file
4 Verify the generated file (optional but smart)
head ~/argo-helm.yaml
Check that it contains valid Kubernetes YAML and does not include CRDs.
Final Command Summary
ssh cka000060
helm repo add argo https://argoproj.github.io/argo-helm
helm repo update
helm template argocd argo/argo-cd \
--version 7.7.3 \
--namespace argocd \
--set crds.install=false \
> ~/argo-helm.yaml
head ~/argo-helm.yaml # Optional verification
Question 6
SIMULATION
Score: 7%
Task
Create a new nginx Ingress resource as follows:
* Name: ping
* Namespace: ing-internal
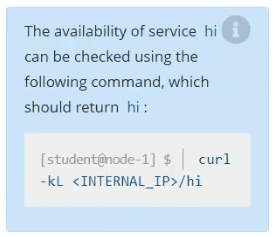
* Exposing service hi on path /hi using service port 5678
Answer : A
Solution:
vi ingress.yaml
#
apiVersion: networking.k8s.io/v1
kind: Ingress
metadata:
name: ping
namespace: ing-internal
spec:
rules:
- http:
paths:
- path: /hi
pathType: Prefix
backend:
service:
name: hi
port:
number: 5678
#
kubectl create -f ingress.yaml
Question 7
SIMULATION
Check to see how many worker nodes are ready (not including nodes tainted NoSchedule) and write the number to /opt/KUCC00104/kucc00104.txt.
Answer : A
solution